 Recessed Light Calculator
KITCHEN LIGHTING FIELD GUIDE
Can Lights in Kitchen: Layout & Placement Guide
·
Can lights—recessed ceiling downlights—work best as the kitchen’s general layer, with task light added where counters need it. Place them from the work surfaces inward—not by dropping an equal grid over the entire ceiling.
Start with counters, the sink, range, aisles, and island; then use room size, fixture lumens, and a target light level to check the overall count.
Plan in this order
- 01 Mark task surfaces
- 02 Draw light rows
- 03 Check count & spacing
- 04 Verify on site
How many? The common 8 × 10 to 12 × 15 ft kitchens below give 4–9 lights in this model; the 12 × 12 ft example gives 8. These use an 8 ft ceiling, 850-lumen fixtures and the Kitchen · general target—not a fixed count for every kitchen. See the inputs and examples.
How far apart? Start a sketch at about half the ceiling height: 4 ft apart at an 8 ft ceiling. Check the fixture optics and model output; Auto is not a ceiling-height-only rule.
How far from the wall? Aim fixture centers over the countertop’s front edge—about 24 in from the wall for a standard 24-in-deep counter, a little farther for deeper counters.
CALCULATOR REFERENCE LAYOUT
12 × 12 ft kitchen · 8 lights in a 2 × 4 grid
This is the model result for the kitchen inputs documented in this guide—not a universal fixture count.
- Room
- 12 × 12 × 8 ft
- Workplane
- about 3 ft (0.9 m)
- Target
- 18.58 fc
- Fixture
- 850 lm · 90°
- Auto result
- 8 lights · 2 × 4
- Model average
- 20.78 fc
- Grid spacing
- 3 ft × 6 ft
Use this as a reference before adapting the task zones and obstructions described below. For a different kitchen, check your room dimensions
Where to place can lights in a kitchen
Put the first rows where they can light the work, then fill the room—not the other way around. A useful sketch marks both the upper-cabinet face and the counter edge, plus the island, sink, range, and main standing paths, before any ceiling points are placed.
Line up wall-side fixture centers over the countertop’s front edge: about 24 in from the wall with a 24-in-deep counter. For deeper counters, we suggest moving slightly farther out to follow the same edge. Align an island row with the main preparation and serving surface, excluding decorative overhangs, instead of assuming the room center is the right target. Leave final positions flexible for joists, ducts, hoods, pendants, cabinet doors, and the fixture manufacturer’s clearance requirements.
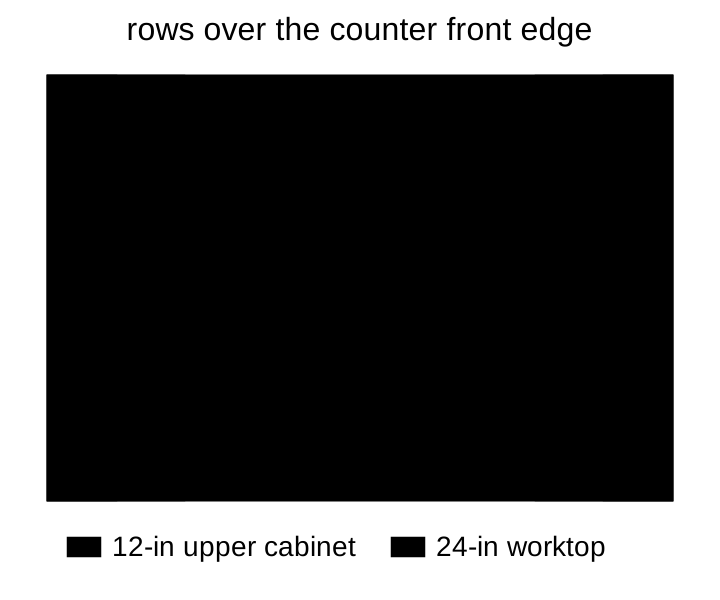
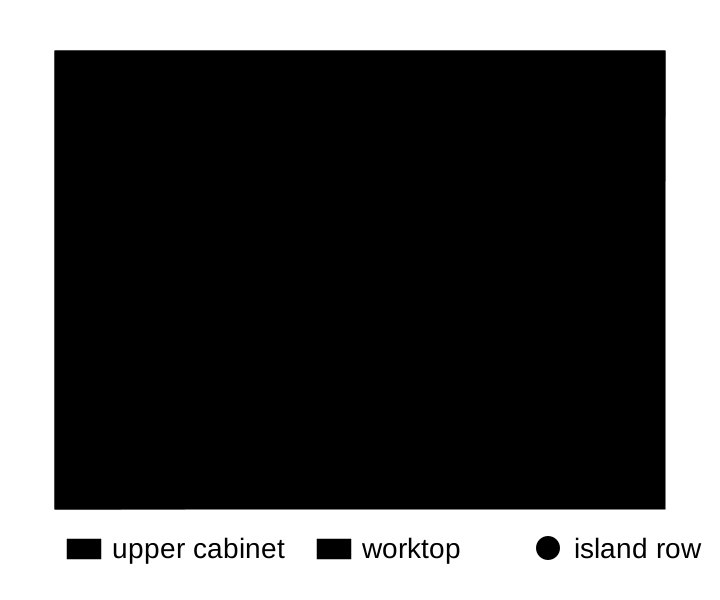
These original diagrams show planning logic, not a fixture count recommendation or an installation drawing.
Kitchen Recessed Lighting Spacing and Wall Distance
Use ceiling height as a rough spacing check, but use the work surface to place the row. For an 8 ft ceiling, about 4 ft center-to-center is a common first spacing sketch. Keep the row’s fixture centers over the countertop’s front edge—about 24 in from the wall for a 24-in-deep counter. For deeper counters, we suggest extending that front-edge alignment a little farther out.
Spacing rule of thumb: ceiling height ÷ 2. That gives a 4 ft sketch at 8 ft, 4.5 ft at 9 ft, or 5 ft at 10 ft. These are starting distances, not a guarantee of countertop coverage. The calculator instead limits Auto pitch using the smaller of mounting height × spacing ratio and beam diameter, while also meeting the target light count. Mounting height is ceiling height minus workplane height; read the room-grid spacing and wall-offset method.
The 4 ft sketch is a general heuristic—not the calculator’s Auto rule. Auto also checks the required lumens, mounting height above the workplane, beam angle, and this tool’s spacing-ratio assumption. In the 12 × 12 ft example below, the simplified model allows up to 7.57 ft between centers, so its 6 ft axis passes that check. It still does not verify countertop shadows or task-level uniformity.
Wall distance is a separate placement decision. For a 24-in-deep counter, set fixture centers over the countertop’s front edge, about 24 in from the wall, following Doug Walter’s guidance in Pro Remodeler. For deeper counters, we suggest following the front edge a little farther out. Measure from the finished wall to the fixture center.
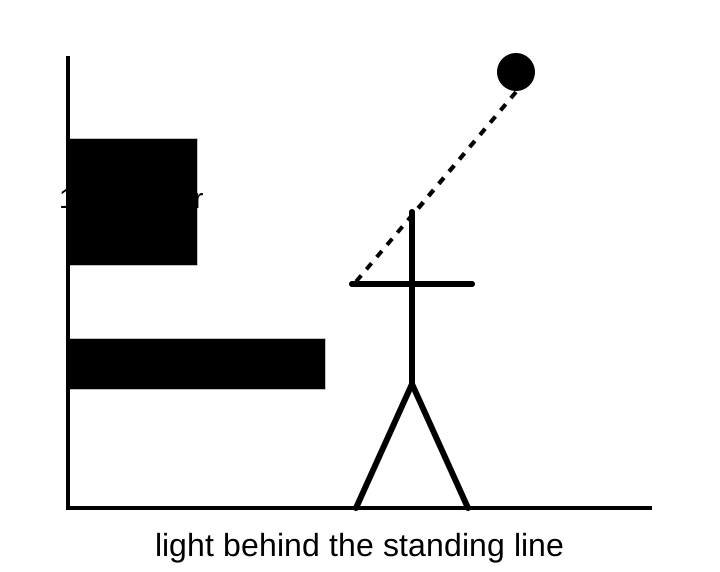
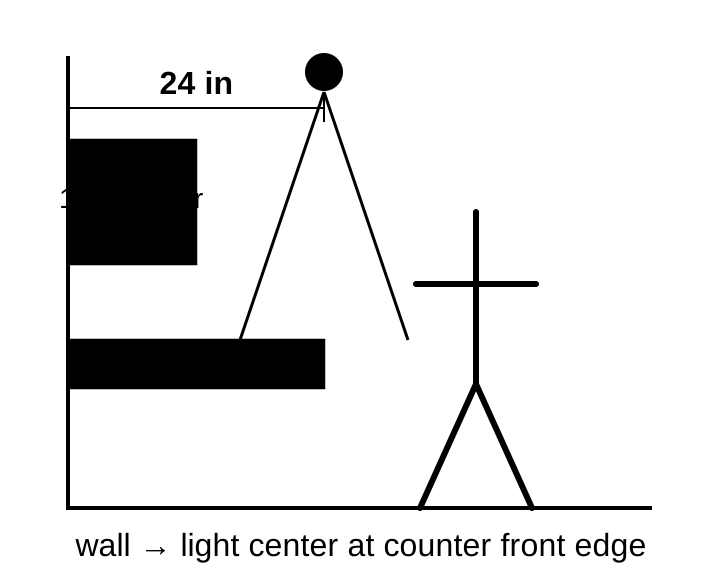
Layer the ceiling plan with undercabinet task lighting where the work surface needs it. Lutron’s kitchen guidance similarly separates ambient light from task light and identifies undercabinet fixtures as an effective way to light counters.
Sources: Pro Remodeler · Recessed Kitchen Lighting Reconsidered (2017) · Lutron · Layered Lighting Tips
How many can lights for a 12 × 12 ft kitchen?
With this calculator’s stated inputs, a 12 × 12 ft kitchen produces an 8-light 2 × 4 Auto grid. That is a conditional model result—not a universal answer for every 12 × 12 kitchen.
Worked examples for common kitchen sizes
Every row uses an 8 ft ceiling, a 0.9 m (about 3 ft) workplane, 850 lm / 10 W / 90° fixtures, a 200 lux (18.58 fc) general-lighting target, UF 0.55, LLF 0.8 and spacing ratio 1.5. The count, grid and spacing are calculated from the same named preset that its link opens.
| Kitchen size & preset | Model result |
|---|---|
| 8 × 10 ft kitchen | 4 lights · 2 × 2 4 × 5 ft spacing |
| 10 × 10 ft kitchen | 6 lights · 3 × 2 5 × 3.33 ft spacing |
| 10 × 12 ft kitchen | 6 lights · 3 × 2 5 × 4 ft spacing |
| 12 × 12 ft kitchen | 8 lights · 2 × 4 3 × 6 ft spacing |
| 12 × 15 ft kitchen | 9 lights · 3 × 3 4 × 5 ft spacing |
Galley application: the 8 × 10 ft example gives 4 lights as a general-layer count. On a separate galley sketch, align rows with the two worktops rather than treating the center aisle as the only task. The model has no cabinet geometry, so relocating a row is not a validated Auto result.
With an island: the 12 × 15 ft example gives 9 lights before any island geometry is modeled. Coordinate pendants and the island working edges with the ambient plan; do not mechanically add extra island cans to that count. The island checks below explain the separate task-layer decision.
Opening a named preset loads its full inputs and replaces the current layout; you can then edit it. The general Kitchen calculator entry sets Kitchen · general and the suggested workplane but is not a measured layout of your room.
Inputs behind the result: Kitchen · general target 200 lux (18.58 fc), about 3 ft (0.9 m) workplane, 850 lm / 10 W / 90° fixture, UF 0.55, LLF 0.8, and spacing ratio 1.5.
What it does not model: cabinets, an island, pendants, undercabinet lighting, surface reflectance detail, joists, vents, shadows, glare, or electrical requirements.
Different room or fixture? Check the same model with your inputs
How to Place Can Lights Over a Kitchen Island
Treat the island as its own task zone. For a long island, start with a row along the long axis rather than borrowing lights from the surrounding room grid; for a wide island, verify whether one row covers both working edges.
- No pendants or an open sightline. Use the main preparation and serving surface—not decorative ends or overhangs—as the placement reference, then verify that the selected fixture covers both working edges without glare.
- Pendants already planned. Coordinate them first. Treat recessed lights as ambient or edge-fill sources where needed instead of giving both layers the full island-lighting job.
- Check seated sightlines. More light is not automatically better if the result creates glare from shiny stone or direct view into the trim.
- Check the layers together. Review cans, pendants, hood light, and adjacent undercabinet light before finalizing positions. Do not add a separate island light count mechanically to the whole-room estimate.
4-Inch vs 6-Inch Recessed Lighting for a Kitchen
Trim diameter alone does not determine brightness or spacing. Compare the exact fixture’s delivered lumens, beam angle, glare control, depth, wet/damp rating, dimmer compatibility, and spacing guidance.
For a replacement, compatibility with the existing opening or housing decides the shortlist first. For a new ceiling, compare the exact fixtures’ light distribution and glare control before choosing the nominal trim size. If both options meet the same lighting and installation requirements, the remaining decision is mainly visual: a 4-inch trim leaves a smaller visible opening, while a 6-inch trim leaves a larger one.
Before ordering a replacement, follow the recessed-light size and measurement guide to record the actual cutout, visible trim and above-ceiling body separately. A nominal 4-inch or 6-inch label is not a cutting template.
For the general decision beyond a kitchen, use the 4-inch vs 6-inch comparison and model-specific dimensions; keep the counter, island and glare decisions on this page.
| Question | 4-inch check | 6-inch check |
|---|---|---|
| Choose it when | The exact 4-inch fixture meets the light, glare, fit, and clearance requirements and you prefer a smaller visible opening | The exact 6-inch fixture meets the same requirements and you prefer or need the larger compatible opening |
| Existing opening | Verify the listed cutout, housing or canless fit, depth, and clearances | Verify the listed cutout, housing or retrofit fit, depth, and clearances |
| Size cannot tell you | Brightness, beam spread, glare, or spacing. Compare delivered lumens, beam/candela data, and manufacturer spacing guidance for the exact models. | |
Check Kitchen Can Lights With the Calculator
Once you have a fixture count and placement plan, compare labor, materials and ceiling repair with the recessed lighting installation cost calculator.
Use the calculator to estimate count, average light level, equal-grid spacing, and wall offsets with your own room and fixture inputs. It does not place lights around cabinets or an island, so transfer the result back to a separate task-oriented sketch before any ceiling openings are finalized.
- 1Enter the room.
Use the finished room width, length, ceiling height, and actual counter-height workplane.
- 2Enter the fixture.
Use the exact lumens and beam angle from the product data, not only the trim diameter or watt-equivalent label.
- 3Choose Kitchen · general.
The maintained average target is a planning input; task layers and local shadows still need separate review.
- 4Compare equal-grid options.
Use Auto as a count/spacing check. Custom changes only the rows and columns across the rectangular room; it does not move individual lights to counters, cabinets, or an island.
- 5Verify before cutting.
Confirm joists, services, fixture clearances, manufacturer instructions, dimming, circuits, and local requirements.
Planning another kitchen? Check your room dimensions Review model assumptions
. Model examples recomputed; wall-distance guidance and diagrams aligned to the countertop’s front edge. Report a source or calculation issue.
Bathrooms need a different task sketch: compare bathroom lighting zones for mirror-face lighting and shower exposure checks.
For an adjoining seating area, use the living room lighting guide to plan ambient, reading and wall-lighting layers separately.
Kitchen Can Lights FAQ
How many can lights in a kitchen?
With this calculator’s kitchen inputs, an 8 × 10 ft room gives 4 lights, a 10 × 10 ft room 6, a 12 × 12 ft room 8, and a 12 × 15 ft room 9. These general-lighting examples use an 8 ft ceiling, a 0.9 m (about 3 ft) workplane, 850-lumen / 90° fixtures, a 200 lux target, UF 0.55, LLF 0.8 and spacing ratio 1.5. They are starting counts, not a universal prescription. Check counter, island and undercabinet task lighting separately; the model does not simulate those surfaces or shadows.
How far apart should recessed lights be in a kitchen?
For a first sketch, divide the ceiling height by two: about 4 ft center-to-center at an 8 ft ceiling, 4.5 ft at 9 ft, or 5 ft at 10 ft. This rule of thumb is not the calculator’s Auto formula. Auto checks the light count, mounting height above the workplane, beam spread and spacing-ratio assumption, so a model grid may use different spacing. Use the exact fixture’s spacing guidance and review task coverage before finalizing the layout.
How far should recessed lights be from the wall in a kitchen?
Aim fixture centers over the countertop’s front edge—about 24 in from the wall for a standard 24-in-deep counter, a little farther for deeper counters. Check your fixture’s beam spread.